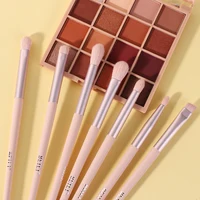
Tips and Tricks About How To Use An Angled Brush in Your Makeup
Share
Makeup enthusiasts, have you ever struggled with mastering the art of using an angled brush in your makeup routine? Look no further, because we are here to help you go from a beginner to a pro in no time! It is a versatile tool that can be used for a variety of makeup applications, from defining your brows to creating flawless winged eyeliner. Using this can be a bit tricky at first. But don't worry, we've got you covered with the right tips and tricks. You'll be able to create a flawless makeup look using an angled brush like a pro.  In this article, we'll share some essential tips and tricks to help you get the most out of your brush set, whether you're a makeup newbie or a seasoned pro looking to up your game. So, grab your angled brush and get ready to take your makeup skills to the next level!
Benefits of using an angled brush
Using this brush has many benefits. First and foremost, it can help you achieve a more precise application. The angled shape of the brush allows us to easily create sharp lines and angles, making it perfect for creating a winged eyeliner or defining our brows. Additionally, these brushes are great for contouring, as they allow you to apply the product in a way that mimics the natural contours of your face. Overall, an angled brush is a must-have in your makeup kit, as it can be used for various applications.
Types of angled brushes
Many different types of brushes are available on the market, each with a different shape and size. Some of the most common types of angled makeup brushes include:
Angled Eyeliner Brush
An angled eyeliner brush is a small, thin brush with a sharp angle. It's perfect for creating a precise line along the lash line, as well as for creating a winged eyeliner look. This type of brush is typically used with gel or liquid eyeliner.
Angled Brow Brush
An angled brow brush is slightly larger than an angled eyeliner brush and is typically used for filling in and defining eyebrows. The angled shape of the brush allows you to easily create a natural-looking arch and fill in any sparse areas.
Angled Contour Brush
An angled contour brush is larger than an angled eyeliner or brow brush and is typically used for contouring the cheeks, jawline, and forehead. The angled shape of the brush allows you to easily apply the product in a way that mimics the natural contours of your face.
Choosing the right brush for your makeup routine
When it comes to choosing the right angled brush for your makeup routine, it's important to consider the type of application you'll be using it for. If you're looking to create a precise winged eyeliner, you'll want to choose a small, thin brush with a sharp angle, like a brush specifically designed for angled eyeliner. If you're looking to fill in and define your brows, you'll want to choose a slightly larger brush, like a brush specifically designed for angled brow applications. And if you're looking to contour your face, you'll want to choose a larger brush with a wide angle, like a brush specifically designed for angled contouring.
How to use an angled brush for eyebrows
Using an angled brush for your eyebrows is a great way to achieve a natural-looking, defined brow. Here's how to do it: 1. Dip your brush into your brow product, whether it's a pomade, powder, or pencil. 2. Starting at the base of your brow, use short, upward strokes to fill in any sparse areas. 3. Use the angled shape of the brush to create a natural-looking arch, following the natural shape of your brow. 4. Use the spoolie end of your brush to comb through your brows and blend the product.
How to Use An Angled Brush For Eyeliner
Using an angled brush for eyeliner can be a bit trickier than using it for your brows, but with a little practice, you'll be able to create flawless winged eyeliner in no time. Here's how to do it: 1. Dip your brush into your eyeliner product, whether it's a gel or liquid liner. 2. Starting at the inner corner of your eye, use short, precise strokes to create a line along your lash line. 3. Once you reach the outer corner of your eye, use the angle of the brush to create a wing, following the natural shape of your eye. 4. Use the brush to fill in any gaps and create a smooth, even line.
How to use an angled brush for contouring
Using an angled brush for contouring can help you achieve a more natural-looking contour. Here's how to do it: 1. Dip your brush into your contour product, whether it's a powder or cream. 2. Starting at your cheekbone, use the angle of the brush to apply the product in a line towards your ear. 3. Use a light hand and build up the product gradually, blending as you go. 4. Use the brush to apply the product to your jawline and forehead, following the natural contours of your face.
Common mistakes to avoid when using an angled brush
When using an angled brush, there are a few common mistakes to avoid. First, make sure to use a light hand and build up the product gradually. Using too much product can create a harsh and unnatural look. Additionally, ensure that you blend your product well to avoid any harsh lines or edges that can be unflattering. Finally, remember to clean your brush regularly to prevent product buildup, which can lead to breakouts and other skin issues.
Tips and tricks for cleaning and maintaining your angled brush
To keep your angled brush in fine condition, it's important to clean it regularly. Here are some tips and tricks for cleaning and maintaining your brush: 1. Use a gentle brush cleaner or mild soap. 2. Rinse your brush thoroughly with warm water, being careful not to get water in the ferrule. 3. Gently squeeze out water and reshape the bristles. 4. Lay your brush flat to dry, being careful not to let it dry standing up, as this can cause the bristles to become misshapen. Using an angled brush in your makeup routine can help you achieve a more precise and natural-looking application. Whether you're using it for your brows, eyeliner, or contouring, it is a versatile tool that can help you up your makeup game. By choosing the right brush for your application and following the tips and tricks outlined in this article, you'll be able to use it like a pro in no time! see more:
